Who doesn’t love the idea of eating ice cream that tastes like spun sugar? My two boys are absolutely obsessed with this Cotton Candy Ice Cream recipe. But after way too many store-bought tubs (and a few questionable artificial flavors), I decided to make it myself. It was honestly a game-changer.
The first time I whipped up a batch, my kitchen smelled like a candy shop. The boys hovered around, sneaking spoonfuls before it even hit the freezer.
So, if you’re ready to make the best homemade cotton candy ice cream, I’ve got you covered. You won’t even need an ice cream maker. Whether you want a no-churn version or a classic churned one, I’ll walk you through every step. And trust me,once you see how easy it is, you’ll never go back to store-bought again.
Table of Contents

How to Make Cotton Candy Ice Cream
There’s something special about making cotton candy ice cream from scratch. Not only does it taste better than the store-bought version, but you can also control the ingredients and customize it to your liking. The best part? It’s super easy to make—even if you don’t have an ice cream maker!
Why This Recipe Works
- Uses simple ingredients that you probably already have in your kitchen.
- No ice cream machine? No worries! The no-churn method works just as well.
- You can adjust the sweetness and colors to match your preference.
- It’s a fun activity to do with kids—they’ll love helping out!
What You’ll Need
Before we get into the step-by-step guide, let’s talk about what you need:
- Mixing bowls – One large and one medium.
- Whisk or hand mixer – For whipping the cream.
- Spatula – To fold ingredients together.
- Freezer-safe container – A loaf pan or airtight container works great.
- Measuring cups and spoons – Precision is key!
If you want to try another fun homemade ice cream, check out this Cookie Monster Ice Cream—it’s another colorful treat kids will love!
Ingredients To Make Cotton Candy Ice Cream
The right ingredients make all the difference in getting that perfectly creamy, melt-in-your-mouth cotton candy ice cream. Here’s exactly what you need:
Key Ingredients & Substitutes
- 2 cups heavy whipping cream – This creates the creamy base. Don’t substitute with milk or it won’t be as rich.
- 1 can (14 oz) sweetened condensed milk – Adds sweetness and keeps the texture smooth.
- 1 tsp cotton candy flavoring – The star ingredient! You can find it online or in baking stores. If you don’t have it, a mix of vanilla and a bit of raspberry extract works too.
- Pink & blue gel food coloring – For that classic swirl. Avoid liquid food coloring as it can mess with the consistency.
- 1 pinch of salt – Balances the sweetness and enhances the flavors.
Want to try another homemade frozen treat? This Banana Pudding Ice Cream is an absolute hit for summer!
Step-by-Step Guide – Making Cotton Candy Ice Cream
Now that you’ve got your ingredients ready, it’s time to bring this cotton candy ice cream to life! Whether you’re using an ice cream maker or going the no-churn route, this step-by-step guide will ensure your ice cream turns out perfectly smooth, creamy, and bursting with that nostalgic cotton candy flavor.
Step 1: Preparing the Base
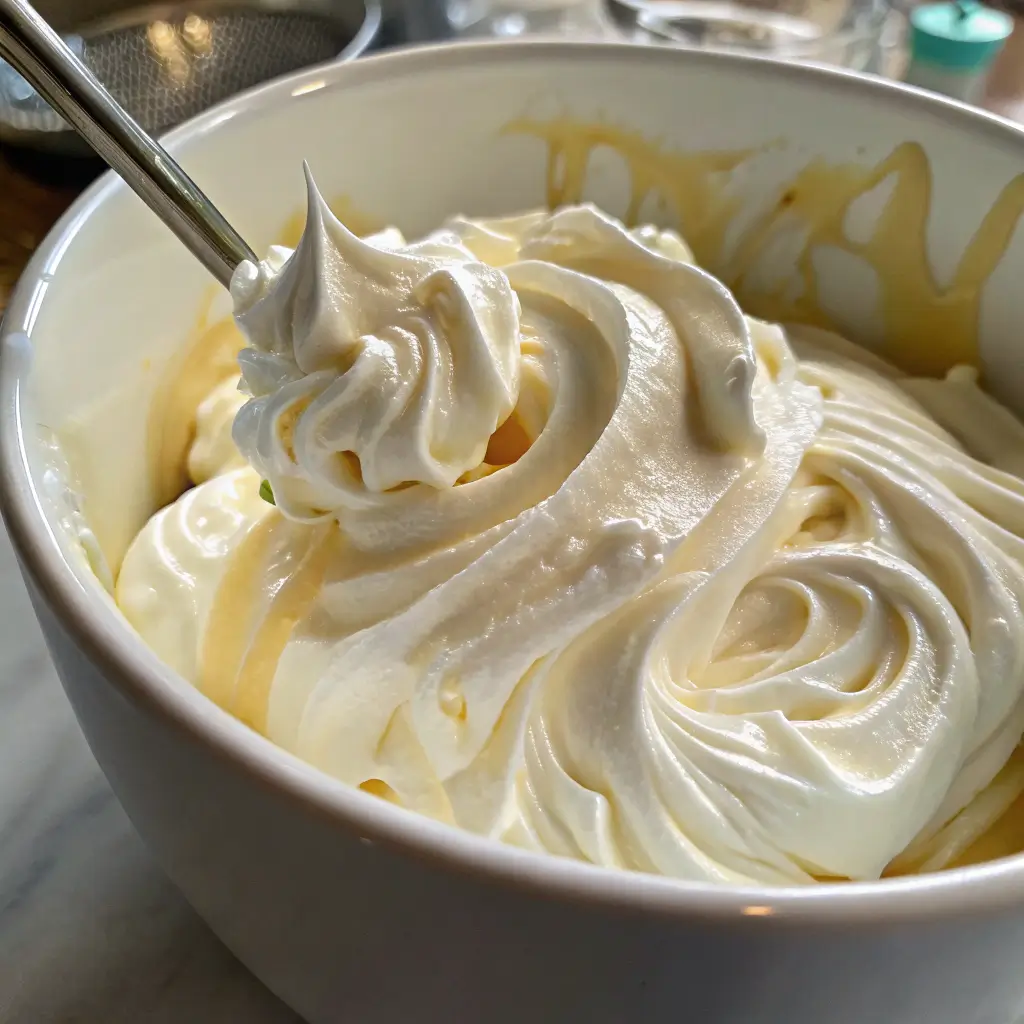
- In a large mixing bowl, pour 2 cups of heavy whipping cream.
- Using a hand mixer or whisk, whip the cream until it forms stiff peaks. This step is crucial for creating a light and airy texture.
- In a separate bowl, mix 1 can (14 oz) of sweetened condensed milk with 1 teaspoon of cotton candy flavoring and a pinch of salt. Stir until fully combined.
Step 2: Adding the Cotton Candy Flavor
- Gently fold the whipped cream into the sweetened condensed milk mixture. Be careful not to overmix—you want to keep it light and fluffy!
- Divide the mixture evenly into two bowls. Add a few drops of pink food coloring to one and blue food coloring to the other. Stir each one until the color is evenly distributed.
Step 3: Chilling & Freezing
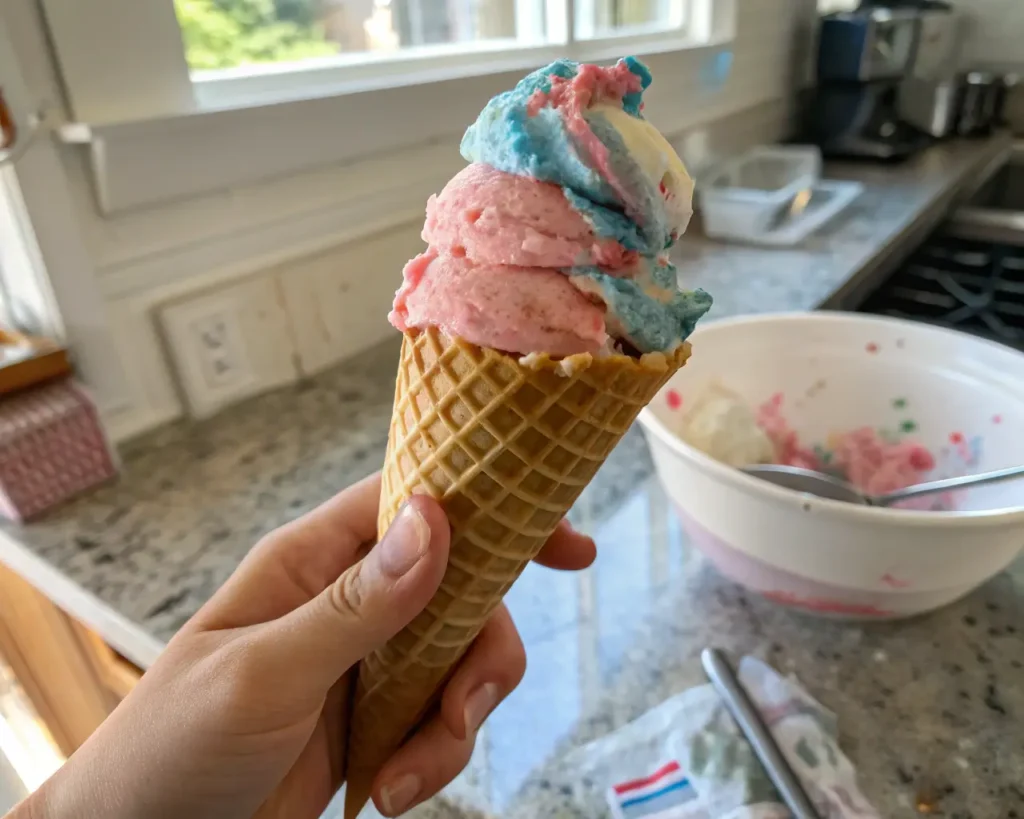
- In a freezer-safe container, alternate scooping spoonfuls of the pink and blue mixtures to create that fun, swirled effect.
- Use a butter knife or skewer to lightly swirl the colors together for a marbled look. Don’t overdo it, or you’ll end up with purple ice cream!
- Cover the container with plastic wrap or a lid and freeze for at least 6 hours, but overnight is best.
Step 4: Serving It Up!
- Once frozen, let the ice cream sit at room temperature for about 5 minutes before scooping. This makes it easier to serve.
- Grab a scoop and enjoy it in a cone, bowl, or even between cookies for a fun ice cream sandwich!

If you want to try other homemade desserts, check out this easy Italian Cream Cake Recipe.
Tips for the Perfect Cotton Candy Ice Cream
Making homemade ice cream is easy, but a few extra tips can make your cotton candy ice cream even better!
How to Get That Classic Pink & Blue Look
- Use gel food coloring instead of liquid. Gel colors are more vibrant and won’t mess with the ice cream’s texture.
- To get distinct swirls, drop spoonfuls of each color separately before swirling gently with a knife.
Achieving the Creamiest Texture
- Make sure your heavy cream is cold before whipping—it helps create that fluffy, smooth base.
- Avoid overmixing once the whipped cream is folded in. Too much mixing can deflate the airiness, leading to a dense ice cream.
- Store the ice cream in a shallow, airtight container to help it freeze faster and stay creamy.
For more frozen dessert inspiration, check out this Banana Pudding Ice Cream—it’s rich, creamy, and full of banana goodness!
Fun Variations to Try
The best thing about cotton candy ice cream is how easy it is to customize! Whether you want a swirl, a dairy-free version, or an extra crunchy twist, these fun variations will take your homemade ice cream to the next level.
Cotton Candy Swirl Ice Cream
- Want a more dramatic swirl effect? Instead of lightly mixing the colors, freeze the pink and blue layers separately for about 15 minutes before swirling them together. This helps keep the colors from blending too much.
- Add a drizzle of cotton candy syrup between the layers for even more flavor!
No-Churn Cotton Candy Ice Cream
- If you don’t have an ice cream maker, don’t worry! The no-churn method (which we followed in this recipe) is just as good, if not better. The whipped cream keeps it light and airy without any churning required.
- For an even smoother texture, take the ice cream out of the freezer after 2-3 hours and give it a quick stir before freezing again.
Dairy-Free Version
- Swap out heavy cream for full-fat coconut cream and use sweetened condensed coconut milk instead of regular condensed milk.
- The coconut base adds a subtle tropical flavor that pairs surprisingly well with the cotton candy taste.
Nutritional Facts (Per Serving)
While cotton candy ice cream is definitely a treat, it’s always nice to know what’s inside each scoop. Here’s a rough breakdown of the nutritional value per serving (about ½ cup):
| Nutrient | Amount |
|---|---|
| Calories | 220 kcal |
| Total Fat | 14g |
| Saturated Fat | 9g |
| Carbohydrates | 22g |
| Sugar | 20g |
| Protein | 3g |
| Sodium | 40mg |
These values may vary slightly depending on the ingredients you use. If you’re looking for a lower-sugar alternative, try using a sugar-free condensed milk and a natural sweetener like monk fruit or stevia.
Best Toppings & Sides
While cotton candy ice cream is delicious on its own, adding the right toppings or serving it with a fun side can make it even better! Whether you’re keeping it simple or going all out, here are some tasty ideas.
Kid-Friendly Toppings
- Sprinkles – A classic! Rainbow sprinkles add a pop of color and a little crunch.
- Mini Marshmallows – Soft, chewy, and perfect for that extra sweet touch.
- Cotton Candy Pieces – Yes, more cotton candy! Tear small pieces and sprinkle them on top just before serving.
- White Chocolate Chips – Adds a creamy bite that pairs well with the sweet, airy flavor.
Classic Pairings
- Waffle Cones or Bowls – The crispy texture complements the smooth, creamy ice cream perfectly.
- Sugar Cookies – Soft and buttery cookies make a great side for scooping up ice cream.
- Fresh Strawberries – The slight tartness of strawberries balances out the sweetness.
- Graham Crackers – A fun option that adds a light, honey-like crunch.
For another fun frozen treat, check out Cookie Monster Ice Cream—it’s colorful, packed with cookies, and just as fun as cotton candy ice cream!
How to Store & Freeze Cotton Candy Ice Cream
If you want to keep your homemade cotton candy ice cream fresh and creamy, proper storage is key. Here’s how to do it right.
How Long Does It Last?
- Homemade ice cream is best enjoyed within 2 weeks, but it can last up to a month if stored properly.
- Since it doesn’t have preservatives like store-bought ice cream, it can develop ice crystals if left too long.
Preventing Freezer Burn
- Store your ice cream in an airtight, freezer-safe container to keep air and moisture out.
- Press a piece of plastic wrap directly onto the surface before sealing the lid to prevent ice crystals from forming.
- Keep the container at the back of the freezer, where the temperature stays more consistent.
When you’re ready to enjoy it again, let it sit at room temperature for a few minutes before scooping. This makes it easier to serve without melting too fast.
FAQs
1. Can I make this ice cream without food coloring?
Absolutely! The pink and blue swirls make it look like classic cotton candy, but they don’t affect the taste. If you prefer a natural look, just skip the food coloring—the ice cream will still taste amazing.
2. What’s the best way to get an intense cotton candy flavor?
Using a high-quality cotton candy flavoring is key! Some brands have a stronger taste than others, so you may need to adjust the amount. Start with 1 teaspoon, then taste the mixture before freezing. If you want more flavor, add a little extra!
3. How do I make this ice cream less sweet?
Cotton candy is naturally sweet, but you can tone it down by:
Using unsweetened whipped cream instead of sweetened.
Reducing the sweetened condensed milk slightly and replacing it with heavy cream.
Adding a tiny pinch of salt to balance the sweetness.
4. Can I use real cotton candy in this recipe?
You can, but it dissolves fast! If you want to add it for extra texture, sprinkle small pieces on top right before serving. Adding it into the ice cream base before freezing will cause it to disappear.

Cotton Candy Ice Cream
- Total Time: 10 minutes
- Yield: 6–8 servings 1x
Description
This cotton candy ice cream recipe is a fun and easy way to bring the flavors of a carnival into your home! No ice cream maker is needed, and it takes just five ingredients to create a creamy, colorful treat that kids and adults will love.
Ingredients
- 2 cups heavy whipping cream (cold)
- 1 can (14 oz) sweetened condensed milk
- 1 tsp cotton candy flavoring
- Pink and blue gel food coloring
- 1 pinch salt
Instructions
- In a large bowl, whip the heavy cream using a hand mixer until stiff peaks form.
- In another bowl, mix sweetened condensed milk, cotton candy flavoring, and salt until well combined.
- Gently fold the whipped cream into the sweetened condensed milk mixture.
- Divide into two bowls and add pink food coloring to one and blue to the other, stirring each gently.
- Spoon alternating scoops of the pink and blue mixtures into a freezer-safe container. Swirl with a knife for a marbled effect.
- Cover and freeze for at least 6 hours or overnight.
- Let sit for a few minutes before scooping, then enjoy!
Notes
- For a deeper cotton candy flavor, add an extra ½ teaspoon of flavoring.
- To avoid icy texture, make sure the cream is well-whipped before folding.
- Store in an airtight container with plastic wrap pressed against the surface to prevent freezer burn.
- Prep Time: 10 minutes
- Category: Dessert
Nutrition
- Serving Size: ½ cup
- Calories: 220 kcal
- Sugar: 20g
- Fat: 14g
- Carbohydrates: 22g
- Protein: 3g
Keywords: cotton candy ice cream, homemade cotton candy ice cream, no-churn cotton candy ice cream, DIY cotton candy ice cream