There’s just something about the smell of homemade fried squash sizzling in a skillet that whisks me away to my grandma’s kitchen. Every summer, we’d visit her little house tucked away in the countryside, where we pick fresh yellow squash from her garden, was the star of dinner that evening. I recall how one used to filch a snip before the fried squash was off the heat and into serving plates, my granny would immediately scream: “Let it cool first!” But who could wait?
Now, I make this same fried squash recipe for my family, and it brings me the same joy. It’s a simple, crispy, Southern classic that pairs well with just about anything—or is just as good on its own. If you’ve never tried frying squash, you’re in for a real treat!
Table of Contents
Ingredients You’ll Need for the Best Fried Squash
Fresh Ingredients for the Perfect Crunch

To make this crispy fried squash recipe, you’ll need just a handful of pantry staples:
Main Ingredients:
- 2 large yellow squash, sliced into ¼-inch rounds (or zucchini, if preferred)
- 1 cup all-purpose flour (for a light coating)
- ½ cup yellow cornmeal (adds crunch and a hint of sweetness)
- 1 teaspoon seasoned salt (adjust to taste)
- ½ teaspoon black pepper
- ½ teaspoon garlic powder (optional, but adds flavor)
- 1 teaspoon paprika (gives a nice golden color and slight smoky taste)
- 1 cup buttermilk (helps the coating stick and adds a subtle tang)
- 2 large eggs, beaten (for binding the coating)
- Vegetable oil for frying (peanut, canola, or sunflower oil work best)
Why These Ingredients Work
Each ingredient plays a role in achieving the best fried squash:
- Flour and cornmeal combine for a light but extra-crispy texture.
- Buttermilk and eggs ensure the coating sticks and fries up perfectly.
- Seasoned salt and spices bring out the natural flavors of the squash.
- Yellow squash or zucchini—both work beautifully for frying!
How to Make the Best Fried Squash Recipe – Step-by-Step Guide
Nothing beats a crispy, golden fried squash recipe made from scratch. Whether you’re cooking for a summer cookout or just craving something crunchy, follow these simple steps to get the best results every time.
Step 1: Preparing the Squash
Before anything else, you’ll want to prepare your squash properly. This step ensures that your fried squash comes out crispy, not soggy.
- Wash the squash under cold running water and pat it dry with a kitchen towel.
- Slice it into ¼-inch rounds—any thinner, and they might burn; any thicker, and they may not cook through.
- If your squash is extra watery, sprinkle a little salt over the slices and let them sit for 10 minutes to draw out excess moisture. Pat them dry before breading.
Why it matters: A drier squash means a crispier finish. Too much moisture in the squash will cause the coating to fall off or turn soggy.
Step 2: Making the Perfect Coating
The secret to perfectly crispy fried squash is in the batter. You need just the right mix of dry and wet ingredients to create a light, crunchy crust.
Dry Coating:
- 1 cup all-purpose flour – Helps the batter stick.
- ½ cup yellow cornmeal – Adds extra crunch.
- 1 teaspoon seasoned salt – Gives the squash a great flavor.
- ½ teaspoon black pepper – Balances the seasoning.
- ½ teaspoon garlic powder (optional) – Adds a mild garlic kick.
- 1 teaspoon paprika – Enhances color and taste.
Wet Coating:
- 1 cup buttermilk – Keeps the inside moist while the outside crisps up.
- 2 large eggs, beaten – Helps the coating adhere to the squash.
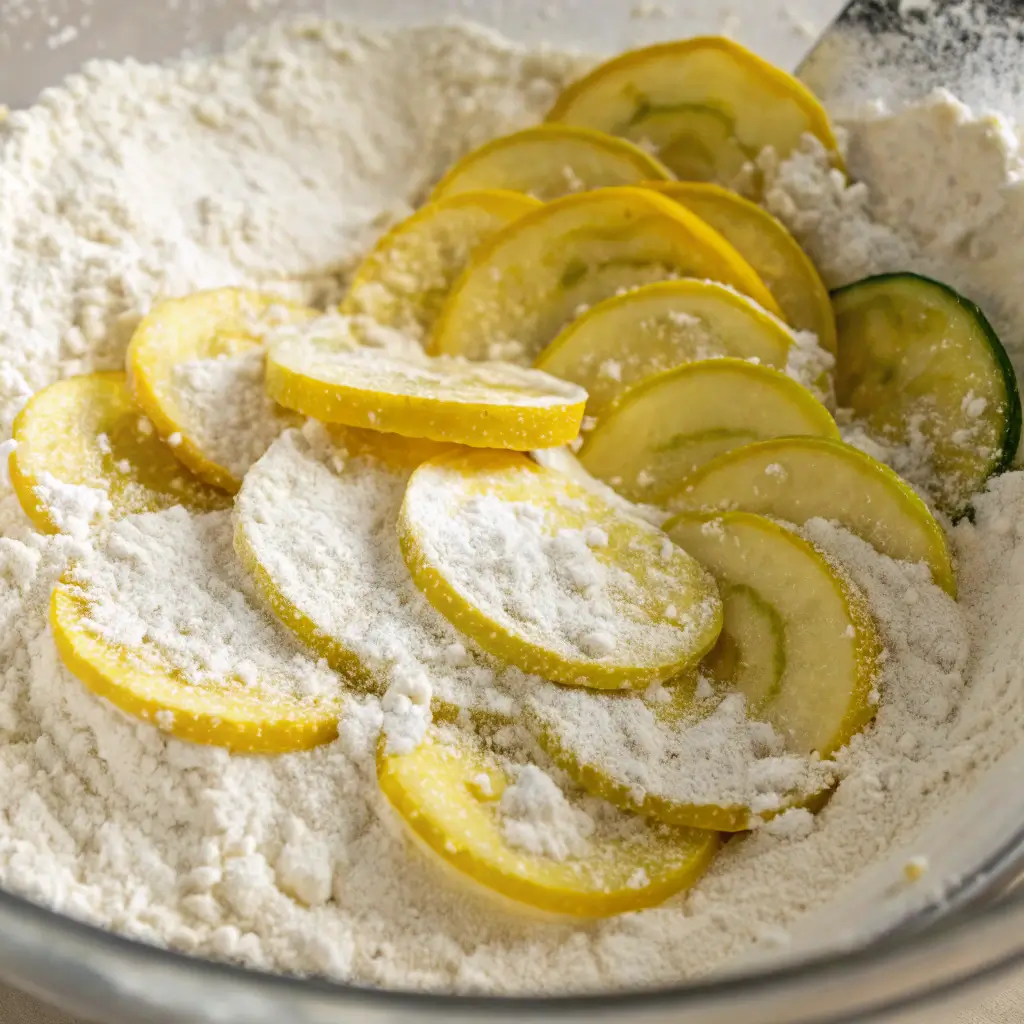
How to Coat the Squash Properly:
- Dip each slice into the buttermilk and egg mixture.
- Dredge it in the flour and cornmeal mix, pressing lightly to make sure it sticks.
- For an extra crispy texture, repeat the process for a double coating.
Pro Tip: Let the coated squash sit for 5 minutes before frying. This helps the batter stick better, preventing it from falling off in the oil.
Step 3: Frying to Crispy Perfection
Now comes the fun part—frying! Follow these tips to get a golden, crispy, and delicious batch every time.
- Use the right oil: Choose a high-smoke-point oil like vegetable, canola, or peanut oil. Avoid olive oil, as it burns too quickly.
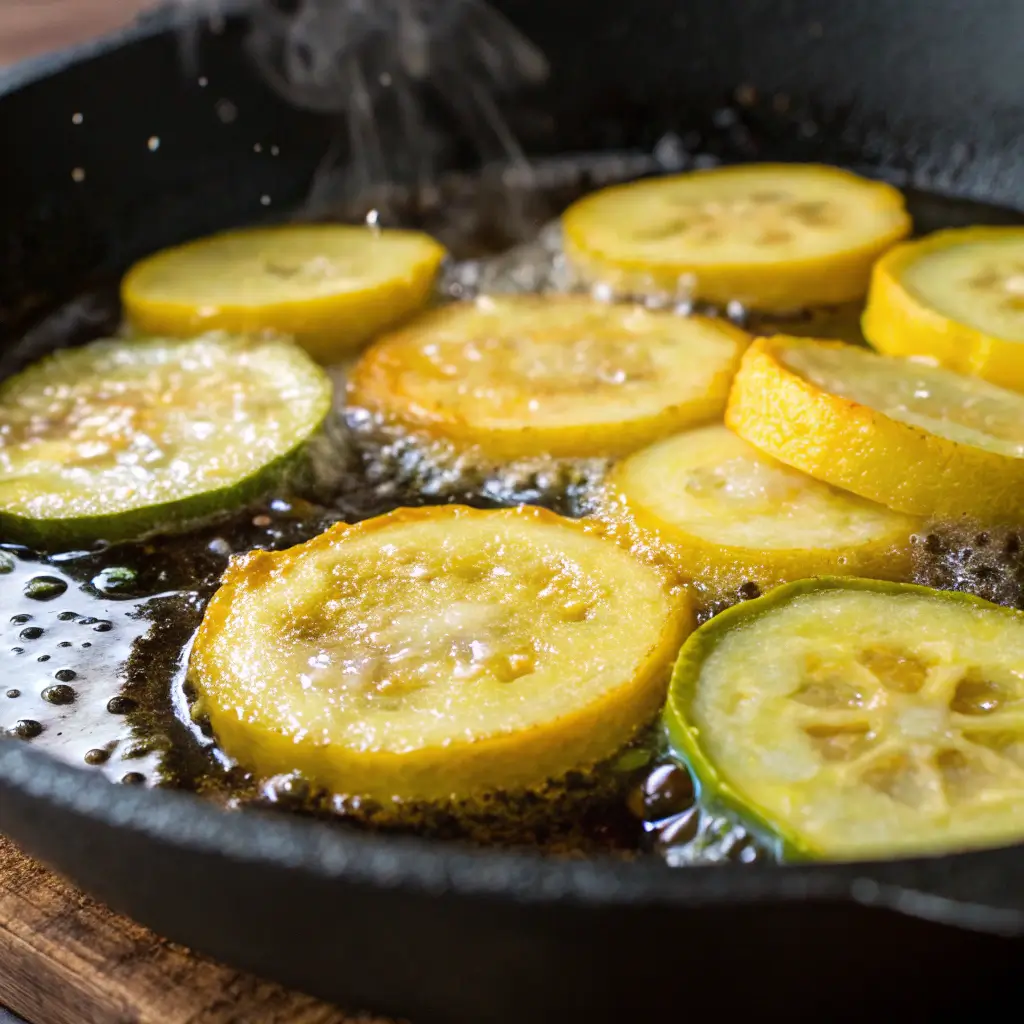
- Heat the oil to 350°F (175°C): If the oil isn’t hot enough, the squash will absorb too much oil and turn greasy. If it’s too hot, the coating will burn before the squash is fully cooked.
- Fry in small batches: Overcrowding the pan will lower the temperature, making the squash soggy instead of crispy.
- Fry for about 2-3 minutes per side until golden brown.
Once done, transfer the fried squash to a paper towel-lined plate to absorb any excess oil.
Step 4: Draining and Serving
Now that your fried squash recipe is ready, it’s time to serve! But before digging in, here are some quick tips:
✔ Drain properly: Always place the fried squash on a cooling rack or paper towels to soak up excess oil.
✔ Serve immediately: Fried squash tastes best when fresh and crispy.
✔ Pair it with a dip: A side of homemade ranch dressing or a light garlic aioli makes this even better.
That’s it! You’ve now mastered the best fried squash recipe step by step. You can complement this meal with a Black Bean and Corn Dip.

Tips for the Crispiest Fried Squash
Everyone loves fried squash that’s light, crispy, and not greasy. Here are my tried-and-true tricks for getting perfect results every single time.
1. Use Cornmeal for Extra Crunch
A mix of flour and cornmeal creates the best crispy texture. The flour sticks well, while the cornmeal adds a slightly grainy crunch.
2. Keep the Oil at the Right Temperature
If your oil is too cool, the squash will absorb too much oil and turn greasy. If it’s too hot, the outside will burn before the inside is fully cooked. Keep a thermometer handy and maintain a steady 350°F (175°C) for best results.
3. Don’t Overcrowd the Pan
Frying too many pieces at once will lower the oil temperature, making the squash soggy instead of crispy. Fry in small batches to maintain that perfect golden crunch.
4. Let the Coated Squash Rest Before Frying
After coating your squash, let it sit for 5 minutes. This helps the batter stick better and prevents it from falling off in the oil.
5. Drain on a Cooling Rack, Not Just Paper Towels
Placing your fried squash on a cooling rack over a baking sheet instead of stacking them on paper towels will keep them crispier longer.
By following these simple but effective tips, your fried squash recipe will turn out crispy and delicious every time!
What to Serve with Fried Squash
Once your fried squash recipe is ready, you might be wondering what pairs best with it. This crispy, golden delight can be served as a snack, appetizer, or a side dish alongside a full meal. Here are some delicious serving ideas to complete your meal.
Perfect Side Dishes for Fried Squash
A plate of fried squash goes well with so many dishes. Whether you’re planning a Southern-style feast or a light summer meal, these options will take your squash to the next level:
- Grilled Chicken or Fish – A lighter protein balances the crispy texture.
- Mashed Potatoes – Creamy and buttery mashed potatoes create a comforting combo.
- Corn on the Cob – A summer classic that adds sweetness to your meal.
- Coleslaw – A crunchy, tangy coleslaw cuts through the richness of fried squash.
- Biscuits or Cornbread – The perfect Southern pairing for a warm and cozy meal.
- Black-Eyed Peas or Pinto Beans – A traditional favorite for a hearty dish.
If you want to add a healthy vegetable side, try this Roasted Broccoli and Carrots recipe for a balanced plate!
Best Dips for Fried Squash
While fried squash tastes amazing on its own, a good dip takes it to another level. Here are some must-try options:
✔ Ranch Dressing – A creamy, tangy dip that complements the crunchy texture.
✔ Garlic Aioli – A flavorful, garlicky sauce that adds a delicious contrast.
✔ Honey Mustard – A sweet and tangy dip for a bold flavor.
✔ Hot Sauce or Sriracha Mayo – For those who love a spicy kick!
How to Turn Fried Squash into a Meal
If you want to enjoy fried squash as the main dish, try these creative meal ideas:
Squash Sandwich – Layer fried squash on a toasted bun with lettuce, tomato, and a drizzle of ranch dressing.
Squash Tacos – Stuff fried squash into warm tortillas, add shredded cabbage, and top with a zesty sauce.
Squash Parmesan – Similar to eggplant Parmesan, just layer fried squash with marinara and cheese.
No matter how you serve it, this fried squash recipe is sure to be a crowd-pleaser!
How to Store & Freeze Fried Squash
If you have leftovers—though it’s hard to resist eating them all—you’ll want to store them properly to keep them crispy and delicious.
How to Store & Freeze Fried Squash
If you have leftovers—though it’s hard to resist eating them all—you’ll want to store them properly to keep them crispy and delicious.
How to Store Fried Squash
✔ Cool Completely – Let the squash cool to room temperature before storing.
✔ Use an Airtight Container – Store in the fridge in a single layer, separated by parchment paper if stacking.
✔ Refrigerate for Up to 3 Days – Fried squash is best eaten fresh, but can last for a couple of days if stored properly.
How to Reheat Fried Squash (and Keep It Crispy!)
Reheating fried foods can be tricky, but these methods will help restore the crispiness:
- Oven or Air Fryer (Best Option!) – Place on a baking sheet and bake at 375°F for 5-7 minutes. If using an air fryer, heat at 350°F for 3-5 minutes.
- Skillet – Reheat over medium heat for a minute on each side to crisp it back up.
- Avoid the Microwave – It will make the squash soft and soggy.
Can You Freeze Fried Squash?
Yes! You can freeze fried squash, but for best results, freeze it before frying. This keeps the breading from getting soggy.
How to Freeze Fried Squash
- Arrange the battered squash slices on a baking sheet in a single layer.
- Flash freeze for 1 hour until solid.
- Transfer to a freezer bag and store for up to 2 months.
How to Cook Frozen Fried Squash
- Fry straight from frozen—no need to thaw! Just add 1 extra minute per side when frying.
- If baking, cook at 375°F for 15-18 minutes, flipping halfway through.
This fried squash recipe is crispy, golden, and full of flavor. Whether you’re serving it as a side dish or enjoying it on its own, it’s a Southern favorite that never disappoints.
If you love this recipe and want more easy side dishes, check out our Honey Thyme Carrots for a sweet and savory veggie option!
Fun Variations to Try
One of the best things about this fried squash recipe is how easy it is to customize. Whether you want a healthier twist, a spicy kick, or a different texture, there’s a version for everyone. Here are some delicious variations to try.
1. Air-Fried Squash – A Lighter Alternative
If you’re looking for a healthier option, try making air-fried squash. It gives you the same crispy texture without all the oil.
How to Make Air-Fried Squash:
- Preheat your air fryer to 375°F.
- Follow the same breading steps as the original fried squash recipe.
- Lightly spray the coated squash with cooking spray to help it crisp up.
- Air fry for 8-10 minutes, flipping halfway through.
- Serve hot and enjoy the crunch without the extra oil!
2. Spicy Fried Squash – Add Some Heat
If you love a little spice, this variation is for you. Just add:
✔ ½ teaspoon cayenne pepper to the dry mix for a mild kick.
✔ 1 teaspoon hot sauce to the buttermilk mixture for extra heat.
✔ A sprinkle of red pepper flakes on top before serving.
Pair this with a cool ranch dip to balance out the heat!
3. Gluten-Free Fried Squash
Want to make a gluten-free version? Just swap the flour and cornmeal for:
✔ Almond flour + crushed pork rinds for extra crunch.
✔ Gluten-free breadcrumbs for a light, crispy coating.
✔ Rice flour + cornstarch for a delicate crunch.
This version is just as delicious, without the gluten!
4. Parmesan Crusted Squash – A Cheesy Twist
For a cheesy upgrade, mix ¼ cup grated Parmesan into the dry coating. The cheese melts slightly when fried, creating an even crispier, flavorful crust.
Pro Tip: Sprinkle a little extra Parmesan on top right after frying for even more flavor.
Nutritional Information
If you’re wondering about the nutrition breakdown of this fried squash recipe, here’s an estimate per serving.
Nutritional Facts (Per Serving)
| Nutrient | Amount |
|---|---|
| Calories | 230 |
| Carbohydrates | 28g |
| Protein | 4g |
| Fat | 12g |
| Fiber | 3g |
| Sodium | 320mg |
1. Can I use zucchini instead of yellow squash?
Absolutely! Zucchini and yellow squash have similar textures, so they both work well for this recipe. The only difference is that zucchini has a slightly milder taste and holds a little more moisture. Just be sure to pat the slices dry before coating them to keep the batter crispy.
2. How do I keep fried squash from getting soggy?
To get perfectly crispy squash, follow these simple tips:
✔ Pat the squash dry before breading it—too much moisture leads to a soggy crust.
✔ Use a mix of flour and cornmeal for an extra crispy coating.
✔ Don’t overcrowd the pan when frying, or the oil temperature will drop.
✔ Drain on a cooling rack instead of stacking them on paper towels.
3. Can I make this fried squash recipe ahead of time?
While fried squash is best when fresh, you can make it ahead of time and reheat it properly:
Oven: Reheat at 375°F for 5-7 minutes.
Air Fryer: Heat at 350°F for 3-5 minutes.
Skillet: Warm it up over medium heat for a minute per side.
4. What’s the best oil for frying squash?
For the best crispy texture, use oils with a high smoke point, such as:
✔ Vegetable oil – A neutral choice that fries evenly.
✔ Peanut oil – Adds a slight nuttiness and works great for frying.
✔ Canola oil – A light and heart-healthy option.
Avoid using olive oil, as it has a low smoke point and can burn quickly.

Fried Squash Recipe
- Total Time: 25 minutes
- Yield: 4 servings 1x
Description
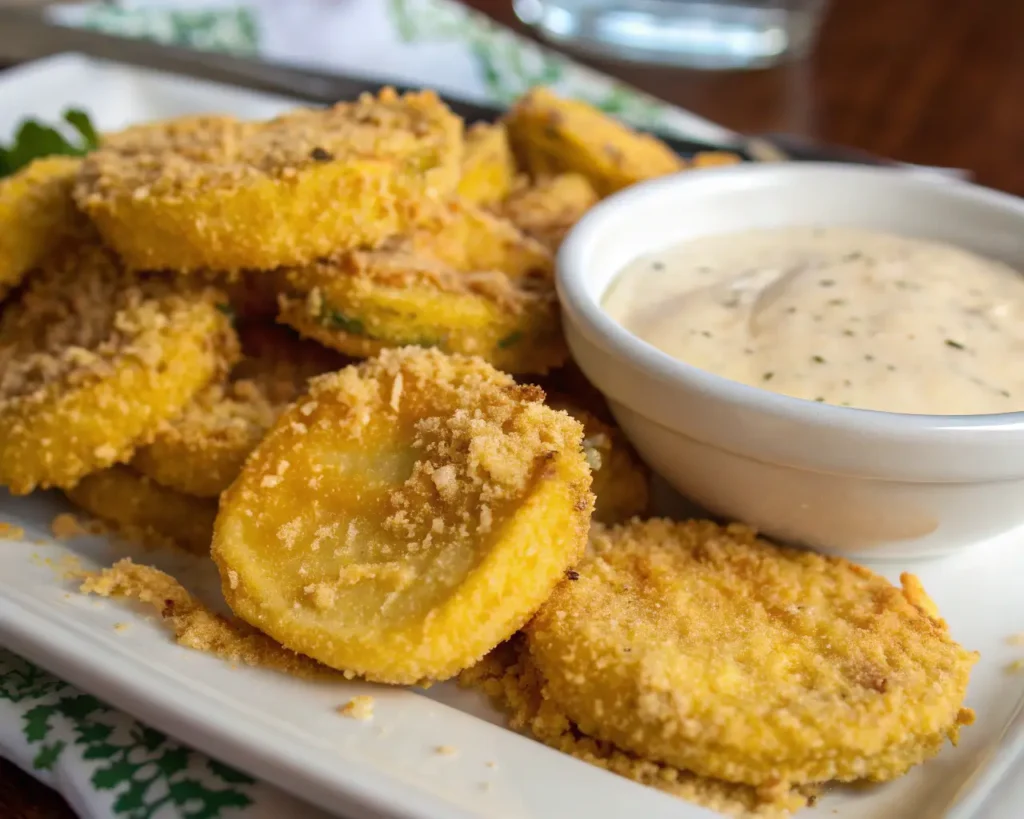
This homemade fried squash recipe is a crispy, golden Southern classic that’s simple to make and absolutely delicious.
Ingredients
- 2 large yellow squash, sliced into ¼-inch rounds
- 1 cup all-purpose flour
- ½ cup cornmeal
- 1 teaspoon seasoned salt
- ½ teaspoon black pepper
- ½ teaspoon garlic powder
- 1 teaspoon paprika
- 1 cup buttermilk
- 2 large eggs, beaten
- Vegetable oil for frying
Instructions
- Prepare the Squash: Wash, dry, and slice into even rounds.
- Make the Coating: In one bowl, mix flour, cornmeal, and seasonings. In another bowl, whisk buttermilk and eggs.
- Coat the Squash: Dip each slice into the buttermilk mixture, then coat with the flour mixture.
- Fry to Perfection: Heat oil to 350°F and fry in batches for 2-3 minutes per side, until golden brown.
- Drain and Serve: Place on paper towels or a cooling rack, then serve hot with your favorite dip!
Notes
- For extra crispiness, double dip the squash before frying.
- Don’t overcrowd the pan, or the squash will turn soggy.
- Store leftovers in the fridge and reheat in an oven or air fryer for best results.
- Prep Time: 10 minutes
- Cook Time: 15 minutes
- Category: Lunch
- Cuisine: American
Nutrition
- Calories: 230
- Sodium: 320mg
- Fat: 12g
- Carbohydrates: 28g
- Fiber: 3g
- Protein: 4g
Keywords: Crispy fried squash, Southern fried squash recipe, Homemade squash fries, Fried zucchini recipe, Easy squash side dish, How to fry squash, Best batter for fried squash, Summer squash recipes